Streamline how you work by utilizing the following Join integrations with the Autodesk family of products:
- Creating a Potential Change Order in Autodesk Build
-
View your Revit models in Join with the built-in Revit Viewer
1. Creating a Potential Change Order in Autodesk Build
Link an accepted Item in Join to a Potential Change Order in Autodesk Build, streamlining the coordination activities between preconstruction and operations. This allows Join to continue to be the decision-making platform of choice for project stakeholders later in the project lifecycle and eliminates duplicate data entry.
First, install the Join app in Autodesk Construction Cloud
- Log in to Autodesk Construction Cloud as an Account Admin
- Navigate to the Apps page and find the Join featured app
- Install the Join app

Note: This first step only needs to be done once by an Account Admin at your company.
Then, link your Autodesk Account in Join
- Expand the Integrations section of an Item
- Click the Add Account button
- Click the Sign in button next to Autodesk, which will redirect you to Autodesk
- Enter your Email and Password
- When asked to authorize the application, click the Allow button, which will redirect you back to Join
- Click the + Connect a Project button
- Select an Autodesk Company and Autodesk Project to link to your Join Project
- Click the Update button

Now you're ready to create a Potential Change Order
- Expand the Integrations section of an Accepted Item
- Click the + Potential Change Order button
- Fill out the fields in the Create Autodesk Potential Change Order window
- Click the Create button

After creating the Autodesk Potential Change Order, you will see it listed in the Integrations section of the Item in Join. In Autodesk, the Description will include a URL to the source Item in Join.


2. Adding Attachments from your BIM 360 or Autodesk Docs workspace
By leveraging your BIM 360 or Autodesk Docs workspace, Join ensures your team is always working with the latest design iteration.
Organize your design files by linking your Autodesk account with Join. By linking PDFs, Revit files, spreadsheets, and other documents stored in Autodesk to the relevant Items and Milestones, you can ensure that you always have the latest version of each document at your fingertips. This eliminates the need to keep track of multiple copies, simplifying your workflow.
First, link to your Autodesk Account
- Select the Add a file button either in the Milestone attachments or Item Attachments
- Select Link Accounts under the Cloud Storage section
- Select the Sign in to Autodesk button
- Enter your Email, and select the Next button
- Enter your Password, and select the Next button
- Select the Allow button
Now you're ready to add your documents
- Select the Add a file button either in the Milestone attachments or Item Attachments
- Under Cloud Storage, select Autodesk
- Navigate the folder structure to the documents that you want to attach (only the Shared Documents folder can be accessed from Join)
- Select them by checking the box
on the left-hand side
- Select Add Files in the lower right corner
Caution: By linking the attachment through Autodesk, the visibility of the linked document will be subject to the permission set in both Join and Autodesk.
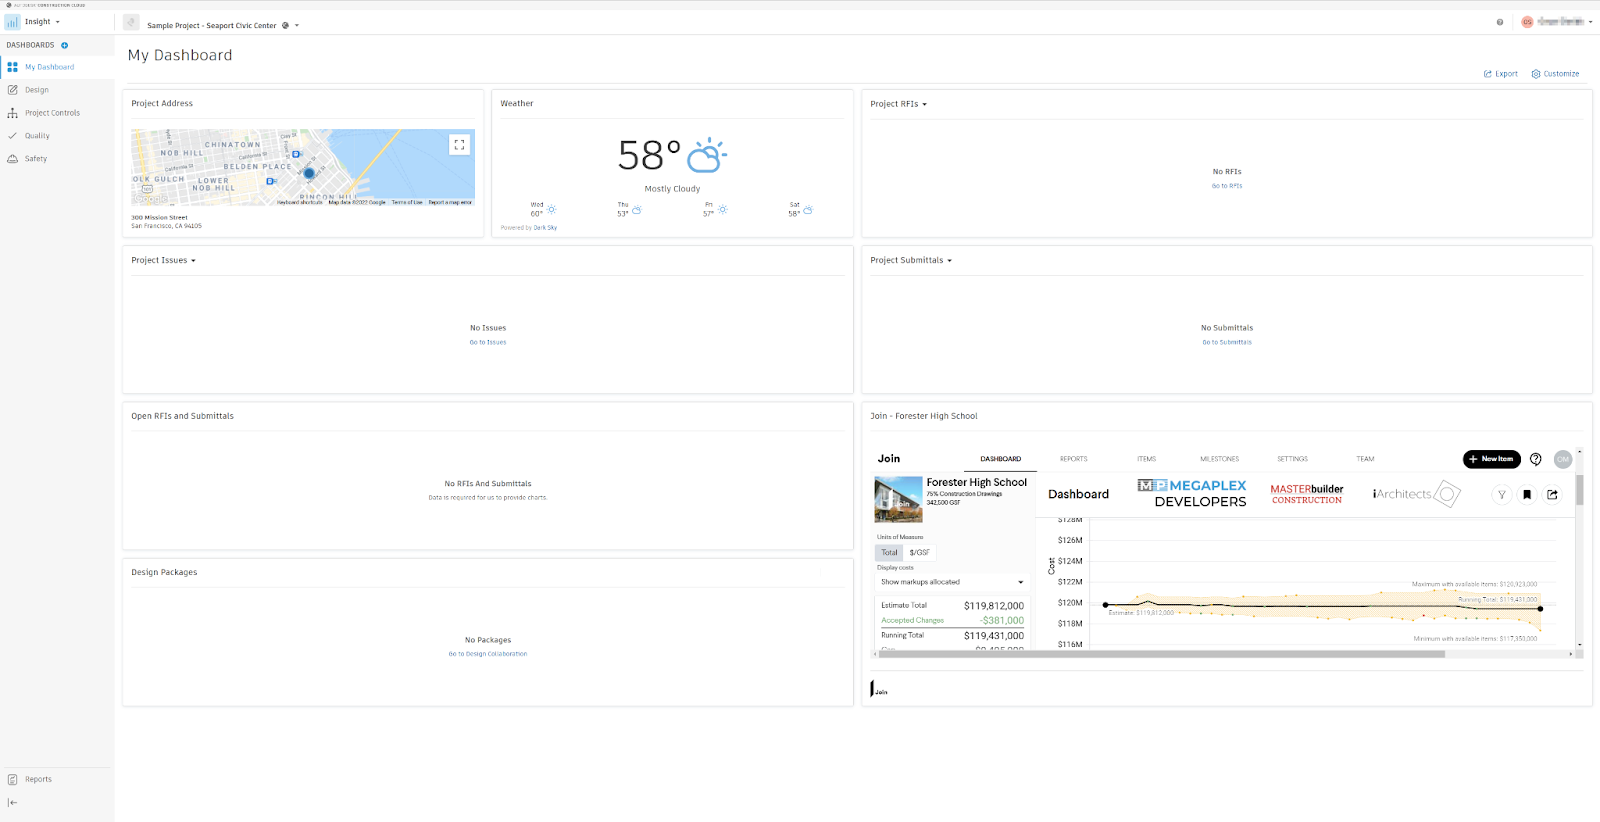
3. Adding Join to Autodesk Construction Cloud
Harness the power of Join's decision making platform from inside your Autodesk Construction Cloud Insights dashboard utilizing the Join Partner Card Integration
Finding your Project Specific Partner URL
Before adding the partner card, you’ll need a project-specific partner URL
- Login to Join
- Navigate to your Join project
- If not already there, click the Dashboard link in the navigation bar
- Copy the URL of the page from your browser
- The following steps are optional but mean Join will always revert to your last view of the Dashboard, including filters and sorting.
Adding the Join partner card to your Insights Dashboard
- Navigate to the relevant Insight Dashboard
- Click Customize in the top right corner
- Click Card Library
- Type Join into the Search bar
- Select the Join partner card
- Click Add Card
- The Join partner card now appears on your dashboard
- Click Configure on the newly added card
- Complete the Card Title (we recommend adding your project name), and paste in your Partner URL
- Click Save
- Your Join Partner Card will now load your project dashboard. You can move it around to a position of your liking
- Finally, click Save in the top right corner of the Dashboard (you may need to scroll up to see it)


Congratulations🎉 You’ll be able to use Join without leaving the Autodesk Construction Cloud platform!
4. View your native Revit models in Join
When you import your Revit models into Join from within the Milestone attachments or Item Attachments tab, you can use the Autodesk Platform Services Viewer to visualize and save views of your models right from within Join.
