At the project level, you can create new Categorizations that are specific to your project, or you can add existing company standard Categorizations that have been created by your Join company administrator at the company level. Once you've created and added the necessary Categorizations to your project, you can organize them in your preferred order.
Creating a Project Categorization
To create a custom Categorization in your project:
- Click Settings in the navigation panel.
- In the Categorization section, click the Manage Categorization button.
- Click the Create New button.
- Enter the Name of the Categorization.
- Enter a Description for the Categorization (optional).
- Select the Categorization Types (optional - all are selected by default).
- Add Categories to the Categorization by importing a list or creating them manually.
- Once the Categories are added, click the Create button.
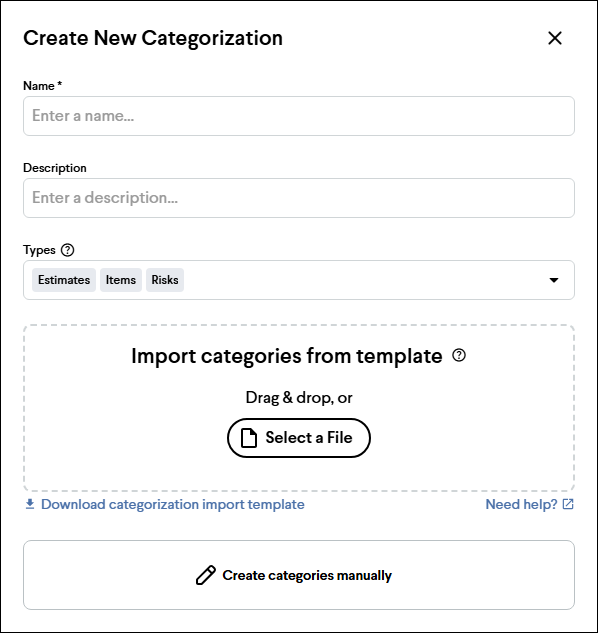
Tip: If you're creating the Categorization manually, you can copy and paste values into the table to save time.
Adding Company Standard Categorizations to a Project
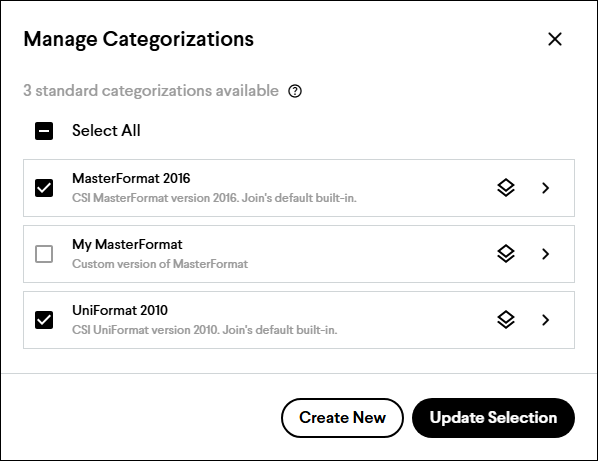
To add company standard Categorizations to your project:
- Click Settings in the navigation panel.
- In the Categorization section, click the Manage Categorization button.
- Check the boxes of the Categorizations you would like to add.
- Click the Update Selection button.
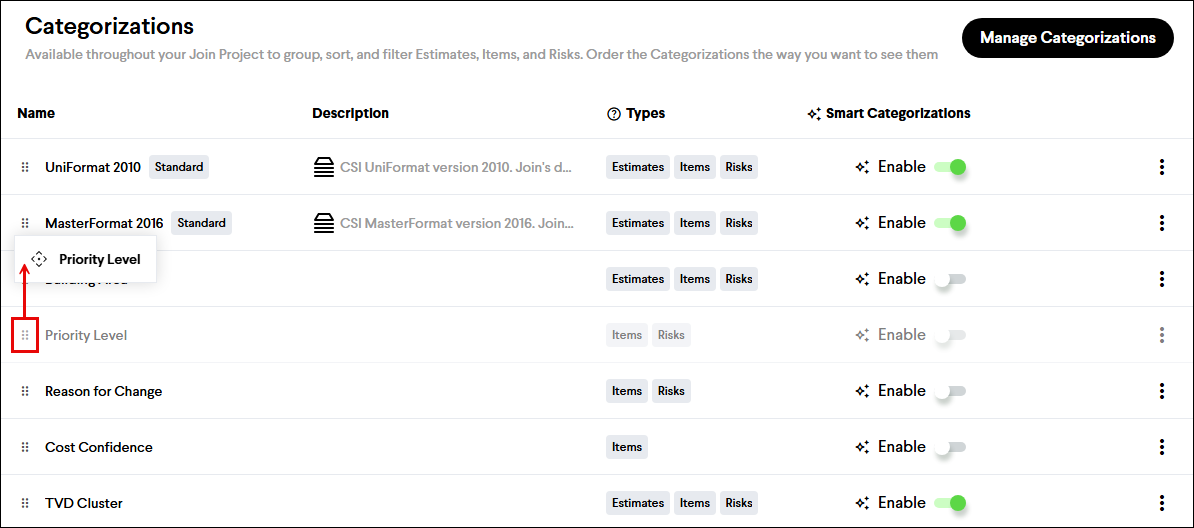
Reordering Project Categorizations
After you've created your project Categorizations and added standard Categorizations to your project, they can be reorganized in your preferred order by dragging and dropping them in the Categorizations section of the Settings page using the handle icon on the far left. The order in which you set the Categorizations will also change the order in which they are displayed in group, sort, and filter lists throughout Join. This is great for keeping the most essential Categorizations at the top of the list.
Deleting Project Categorizations
To delete a project Categorization from your project:
- Click Settings in the navigation panel.
- In the Categorization section, click the Options button to the far right and select Delete.
- Click the Delete button to confirm.
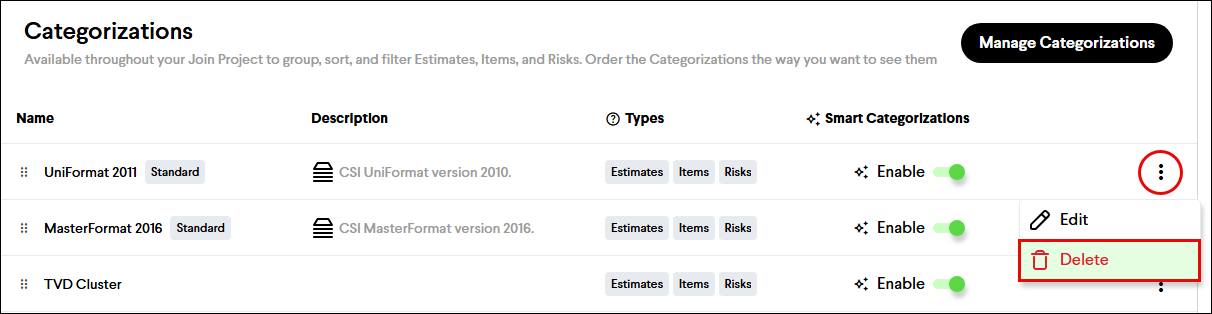
Caution: Deleting a project Categorization, or removing a company standard Categorization from a project, will delete all previously assigned Categories, which can't be restored.