Use units of measure to track the changes in key metrics as a project progresses and to see the cost per unit of these key metrics. In this article, you’ll learn how to enable units of measure, how to enter quantities, and how these key metrics are used throughout Join.

Enabling Units of Measure
From the Settings Page
To enable the units of measure from the Settings page, follow the steps below:
- Click Settings in the navigation panel
- Scroll down to the Units of Measure section and click the Manage Units of Measure button
- Select the check box for each unit of measure to be enabled
- Click the Save button

From the Milestone Metrics Tab
To enable the units of measure from the Milestone Metrics tab, follow the steps below:
- Click Milestones in the navigation panel
- Click the name of the Milestone
- Click on the Metrics tab
- Click the Manage Units of Measure button
- Select the check box for each unit of measure to be enabled
- Click the Save button
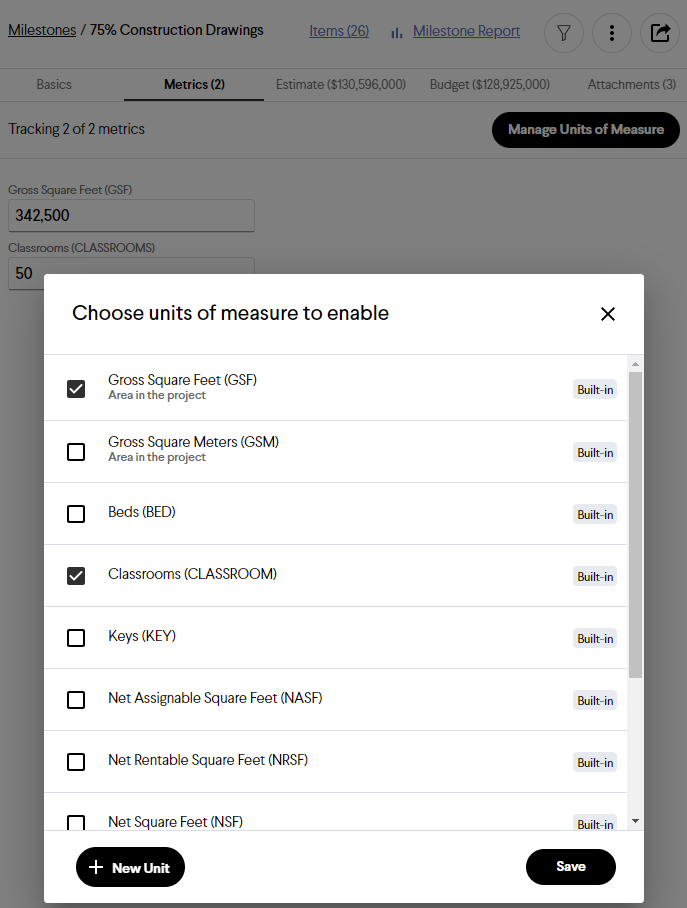
Tip: Join has several common units of measure built in, but you can create custom units of measure by using the + New Unit button.
Entering Quantities for Each Unit of Measure
To enter quantities for each unit of measure, follow the steps below:
- Click Milestones in the navigation panel
- Click the name of the Milestone
- Click on the Metrics tab
- Enter the quantities for each unit of measure
Note: The quantities entered for each unit of measure are specific to each Milestone and can change as the project progresses through preconstruction.
Where/How is This Used in Join?
Navigation Panel
The cost summary can be displayed as total cost or cost per unit of measure using the Units of Measure selector in the navigation panel.

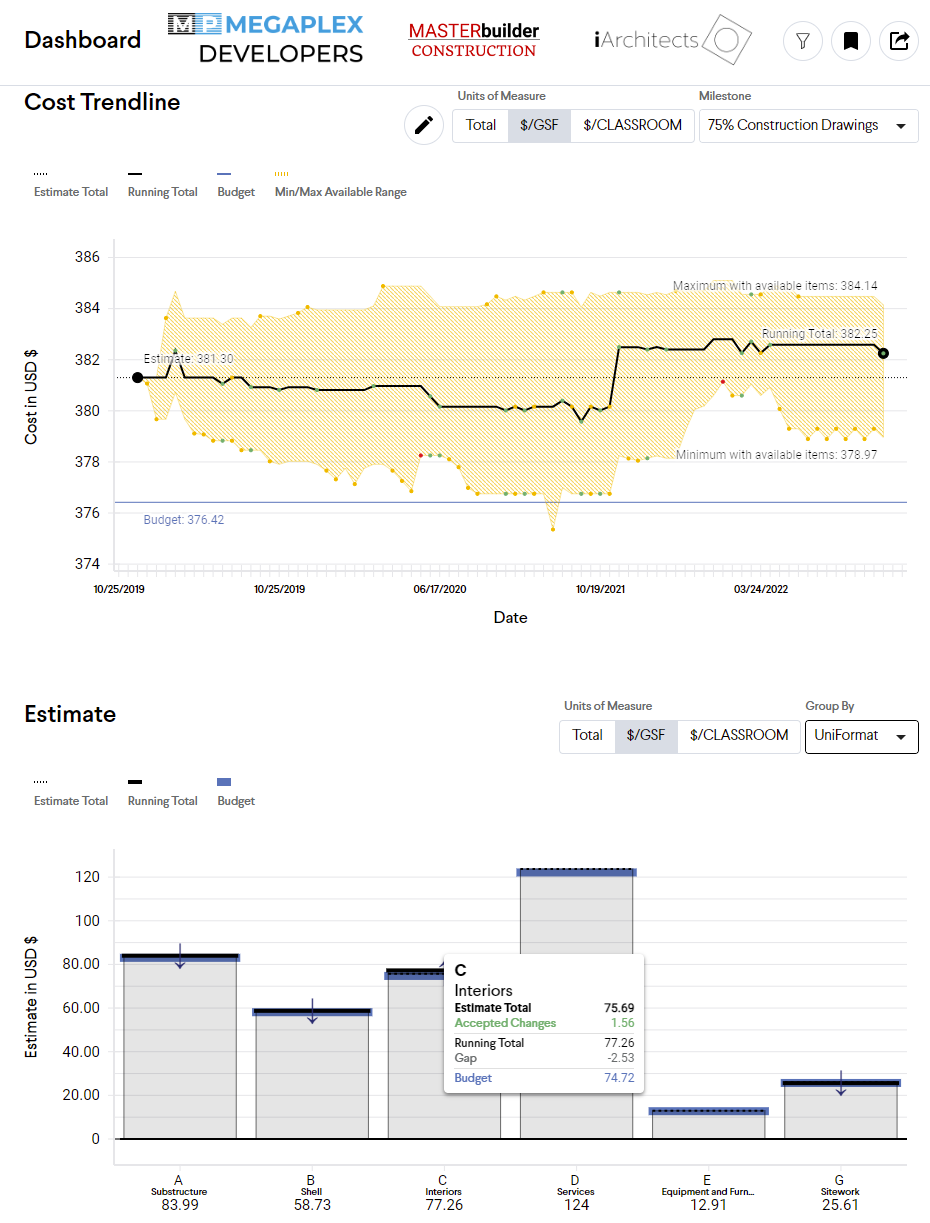
Dashboard
The costs shown in the Cost Trendline and Estimate charts on the Dashboard can be displayed as Total cost or cost per unit of measure.
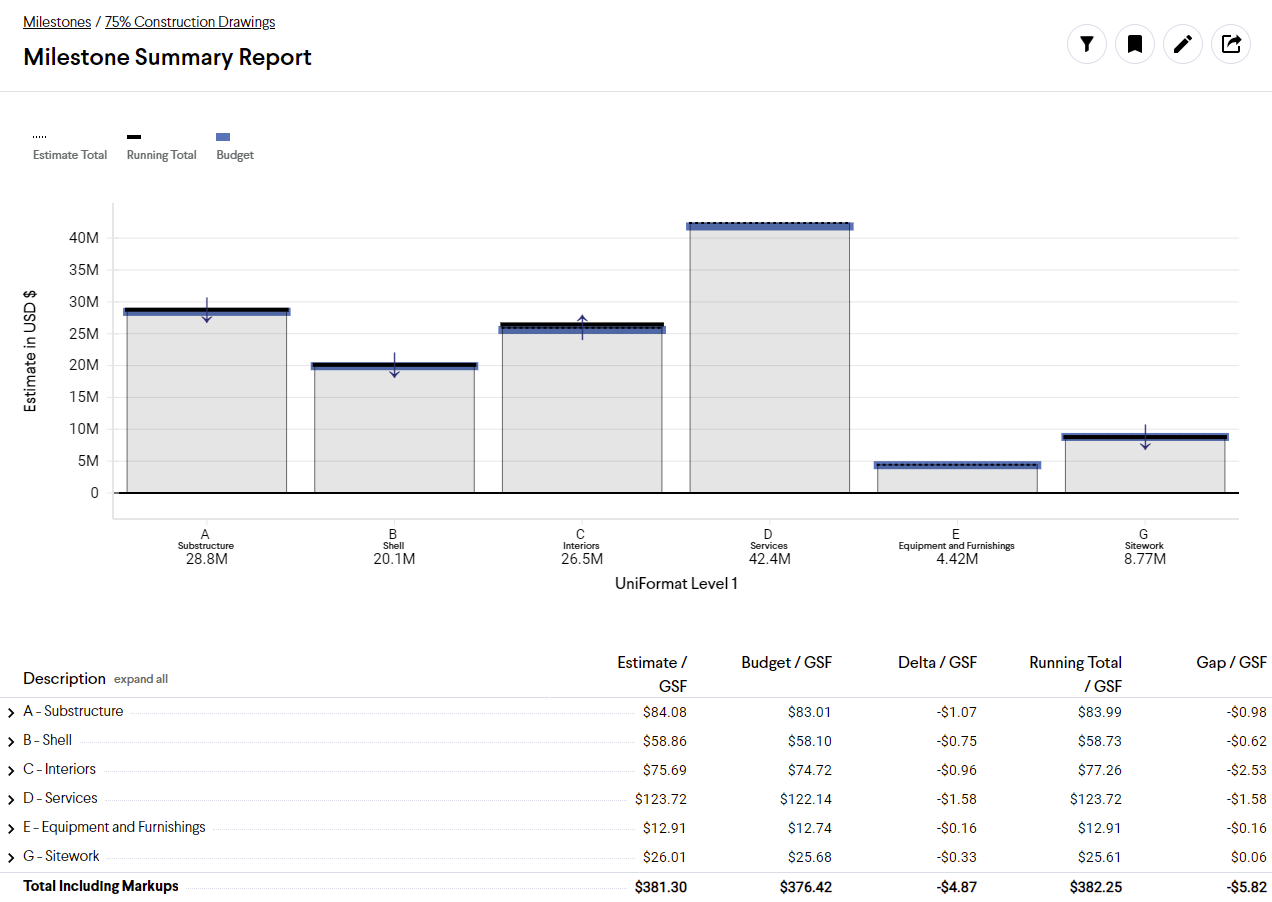
Reports
In some reports, the cost per unit of measure columns can be turned on.