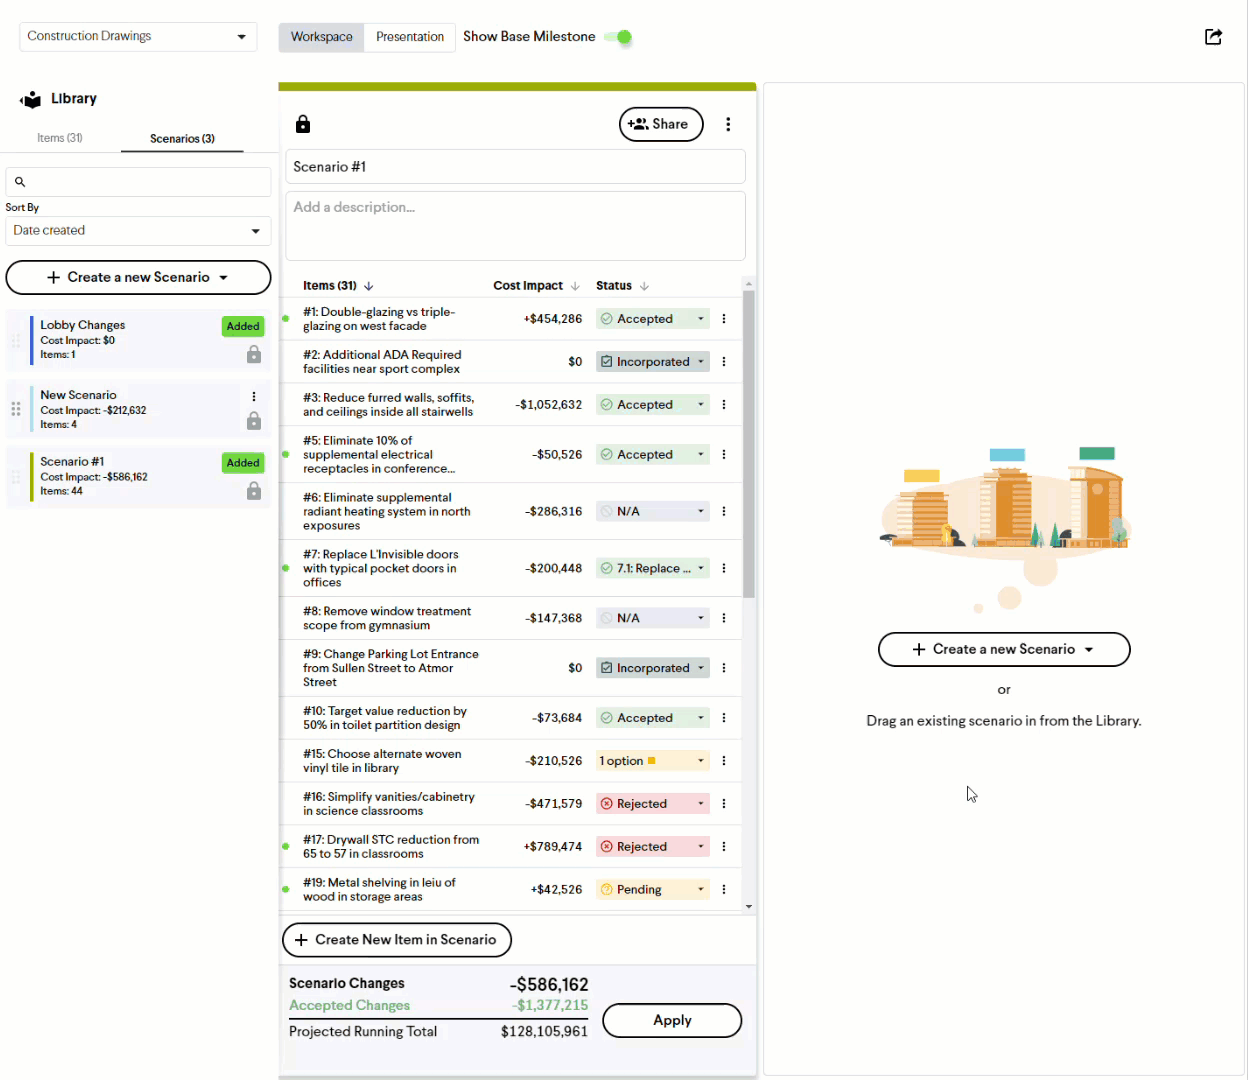
Scenarios
Scenarios allow you to model and present potential outcomes with Status changes to existing Items or new Items specific to a Scenario. This will enable you to display a "What if situation" without impacting the Cost Trendline or the Item's change history. The net impact of a Scenario is presented in the Scenario Changes, along with the new Accepted Changes value and the Projected Running Total. These can be compared to the Current Base Milestone and other Scenarios.
Tip: If you have similar Scenarios, you can build one and copy it to save time when developing the others.
Creating a Scenario
- Click Scenarios in the navigation panel.
- Click the + Create a new Scenario button.
- Select either Start with a blank scenario (where you'll drag over the Items you want to include) or Copy items from base milestone (for the full list of Items as they currently sit in the project).
- Enter a name and description for the Scenario.
Creating a Scenario Item
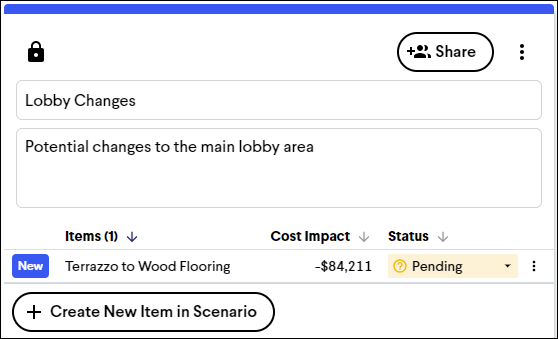
After creating a Scenario, you can create new Items that only affect that Scenario. Click the + Create New Item in Scenario button at the bottom of the Scenario and create the Item the same way you would in your main project. New Scenario Items can be identified by the New tag to the left of the Item.
Presenting a Scenario
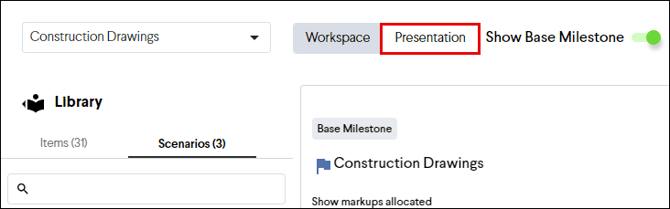
When ready to present scenarios to the team, select the Presentation view at the top of the Scenarios page.
This view will focus on the changes made in each scenario for an easier comparison. You can turn off the Base Milestone to directly compare two potential paths forward, or keep it on to compare it to your other Scenarios.
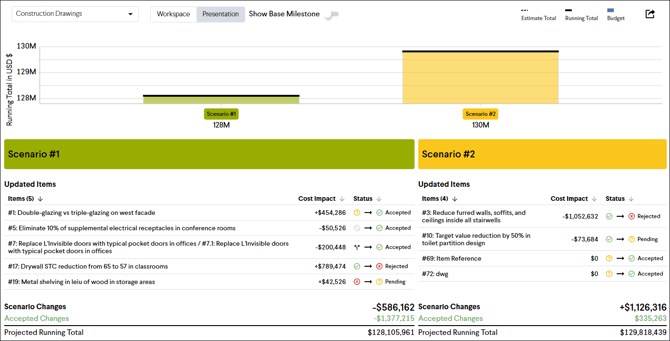
Note: Only new Scenario Items and Items with a proposed status change will appear in the presentation view. Items without a status change will be excluded from the presentation view for a more concise summary.
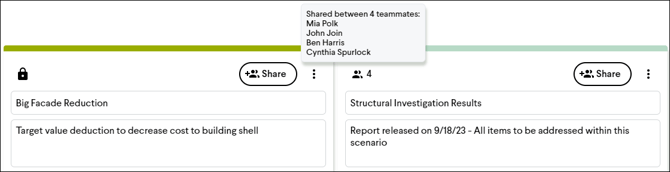
Sharing a Scenario
When creating a new Scenario, it is private to yourself (indicated by a lock icon). To collaborate with others on your Scenario, you can choose who you'd like to share it with (indicated by a teammates icon). Share a Scenario by following these steps:
- Click the Share button at the top of a Scenario in the Workspace view.
- Click the check box next to each teammate you want to share the Item with.
- Click the Share button at the bottom right. The Scenario will now be visible and editable to the selected teammates on their Scenarios page.
Note: Project Administrators can control teammate permissions for shared Scenarios on the Team Roles page.
Applying a Scenario
When you are done creating and evaluating your Scenarios, you can apply the Scenario to your project by clicking the Apply button at the bottom of the chosen Scenario. Applying a Scenario will make the following changes:
- Change the Item status of all Items in that Scenario (if changes were made).
- Adjust the Accepted Changes and Running Total values in the project based on the Accepted Items.
- Publish the newly created Scenario Items.
- Update the Item change history for all affected Items.

Caution: Applying a Scenario cannot be undone. Before applying a Scenario, review all changes with your team in detail.