Draft Items
Collaborate on Items before they're visible to the whole team.
Draft Items can be used as a collaborative tool to work on Items before publishing them to the project. It's common for it to take time to fully develop an Item before publishing it to the project, as this can impact the Cost Trendline and reports. By utilizing Draft Items, teammates can work together to refine the details and ensure the Item is ready to publish.
Creating a Draft Item
To create a new Draft Item, follow these steps:
- Click the + New Item button
- Enter the name of the Item (required field)
- Click the Create as Draft button to create the Draft Item

Sharing a Draft Item
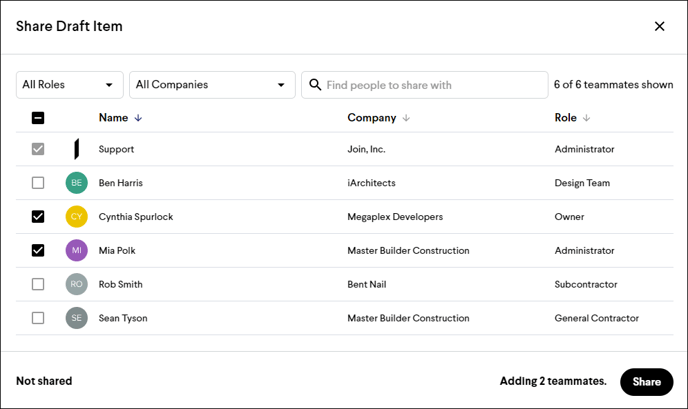
Once you've created a Draft Item, you can choose to share it with your project teammates to collaborate on before publishing it for the whole project to see. To share a Draft Item, follow these steps:
- Open the detailed view of a Draft Item
- Click the Share draft button in the top right
- Click the check box next to each teammate you want to share the Item with
- Click the Share button in the bottom right

Tip: You can remove a teammate from a Draft Item following the same steps above and unchecking the box next to their name.
Publishing a Draft Item
When you are done collaborating on the Draft Item, you can publish it to the project. This will make it visible to all teammates on the project and will now impact the charts, costs, and other data. The Draft Item History will only be visible to those whom the Item was previously shared with before publishing. To publish a Draft Item, follow these steps:
- Open the detailed view of a Draft Item
- Click the Publish item button in the top right
- Select Publish Draft
Caution: Once a Draft Item is published, it cannot be unpublished.