.svg)
Decision-making often requires a choice between multiple overlapping options, which is difficult to manage when you’re using spreadsheets. In Join, you can easily set this up as multiple “Options” within an “Item” where the options are mutually exclusive. Setting up multiple Options makes it easy to view a range of costs for one Item without artificially inflating or deflating the potential value of a project decision. Additionally, when you accept an Option, all of the other related Options are automatically set to "Not Chosen" so you can move on to other decisions right away.
Some common use cases for using Options are:
- A preconstruction manager wants to propose a change like removing sunshades. Rather than simply removing them all, they would like to explore options that include multiple iterations like 25% removal, 50% removal, and 100% removal.
- An owner has agreed to choose a different facade, but the selections will affect the overall project duration. To make an informed decision, the team needs to consider the cost and schedule impact of each possibility.
- The team has agreed to explore a change that has a broad scope, like updating a meditation garden. They want to explore varying changes within that garden like different choices for paths, walls, and design.
Viewing a Group of Options
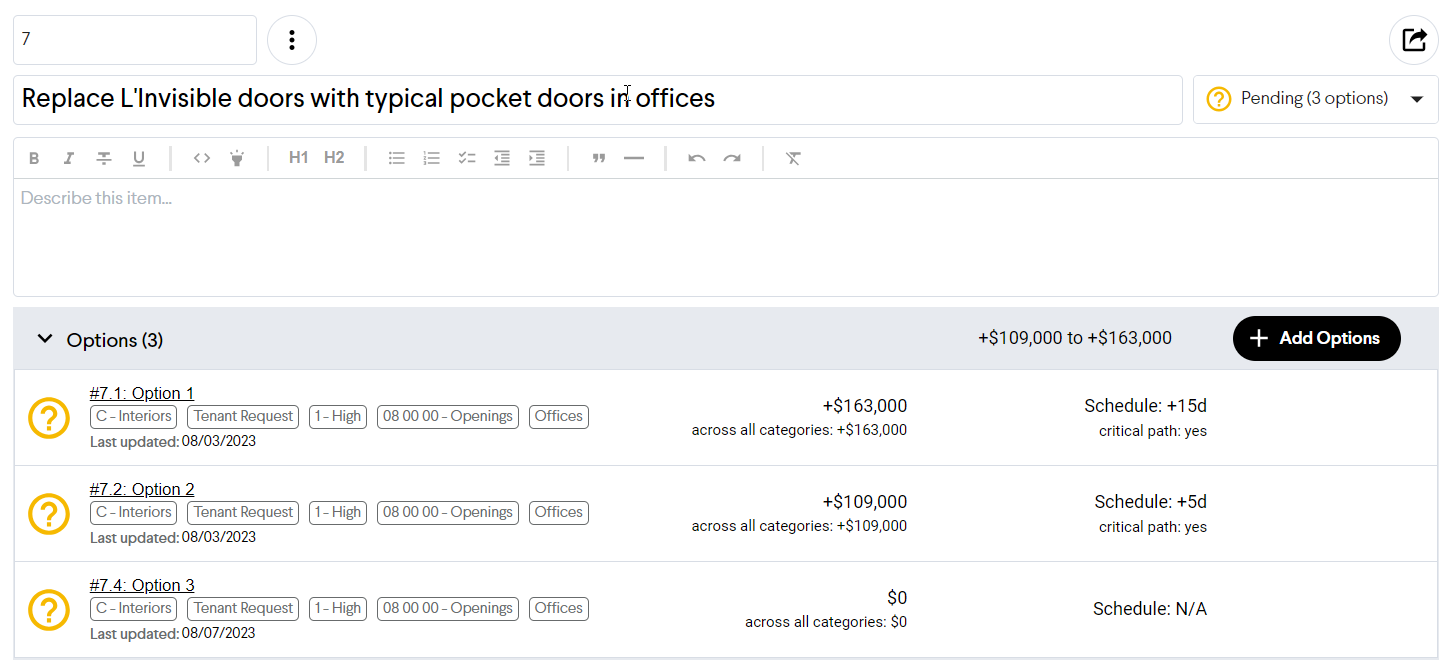
After you create several Options, you can view a quick summary of them all when viewing the Item that they’re linked to. Here, you can see a quick preview of each Option’s number, name, status, cost, and more.
View the Details of an Option
When you click on an Option to view its details, it will look similar to an Item with a few differences:
- There’s a link back to the parent Item at the top
- When you use the forward/backward links, those will navigate to the other Options within the Item (rather than toggling between the full list of Items in your project)
- The milestone for the Option isn’t editable because it’s tied to the Item

Identifying Items With Options in the Items List View
When in the Items List view, you can quickly identify any Items that have Options by looking for a light grey Item with an expand arrow on the left-hand side. There will also be an Options icon followed by a list of small clickable squares that preview all the Options in that Item. You’ll also notice that Items with Options may have a range of costs rather than a single cost impact.

Permissions for Managing Options
How much information you can view or manage for Options depends on your permissions. If you have access to create Items, you’ll also have access to create Options. If you have access to edit Items, you’ll also have access to edit and detach Options.